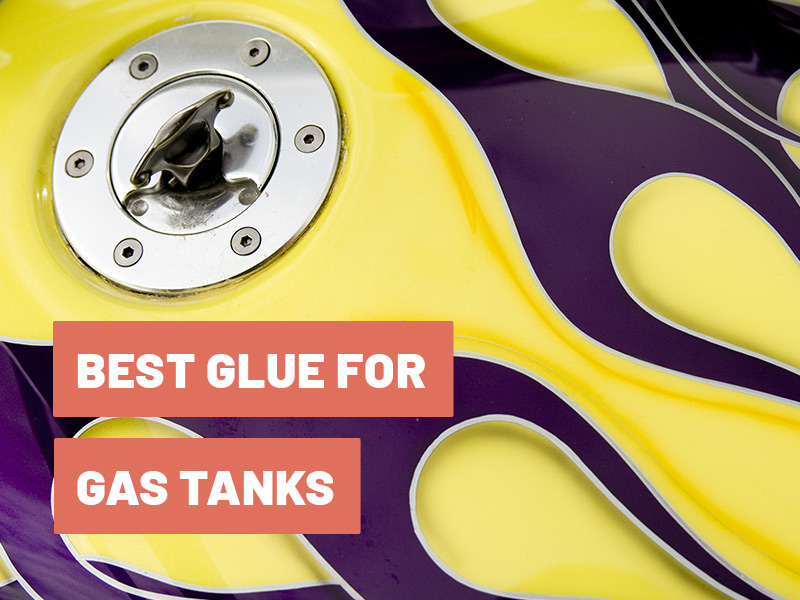
Patching your car’s gas tank doesn’t seem like a good idea if you don’t know what you’re doing.
The best-case scenario is you lose some fuel if you don’t patch it up right. Worst case scenario is much worse.
Fortunately, this article will give you a rundown of how to use glue to patch your gas tank!
It’s not a difficult process, especially if you follow the instructions on the adhesive label.
You can use epoxy glue or silicone sealant to patch your car’s gas tank.
These three methods follow the same principle, so you shouldn’t have any problem using these glues for the job.
Recommendation – Versachem 90180 Heavy-Duty Fuel Tank Repair Kit comes with all the tools you need for quick, durable, professional-quality repairs. Whether you want to patch pinholes, cracks, or rust-outs, this is exactly what you need! This epoxy works to fix gasoline and diesel fuel leaks and sticks to smooth surfaces like plastic and metal.
Keep reading for other great adhesives, plus some instructions on how to fix gas tanks!
What Works for Patching Gas Tanks?
There are multiple ways of patching up a leaking or damaged gas tank, but they’re not interchangeable.
Some methods work for small areas, while others are suited for extensive damage. Some methods don’t work on certain types of damage.
Let’s take a look at the best options, and let’s see the advantages and disadvantages of each one.
Silicone Sealant
The most popular and obvious choice for gas tank repairs is silicone sealant.
Given its unique properties, this sealant has many great advantages.
First, it’s resistant to heat and remains stable under a wide range of temperatures.
Then, it’s also highly moisture resistant. Not only that, but it also repels water, creating watertight seals.
Silicone sealant has great resistance to a lot of weather factors. It also has low toxicity, low chemical reactivity, and low thermal conductivity.
You can use it to seal virtually anything, from gas tanks to electrical wires and anything in between.
It’s no surprise that silicone sealant is used for many materials and across many industries.
This adhesive is also very easy to use because you can control the flow and application with a caulking gun.
It takes a few hours for the silicone to harden, but after that, you’ll have a very strong and secure bond.
Epoxy Glue
Epoxies are another great option for patching gas tanks, although they’re only going to work for fixing small areas.
If there’s extensive damage, you’ll have to use welding.
However, epoxy adhesive is the easiest and most affordable fix for small damage such as hairline cracks, pinholes, or holes no larger than 1/2” in diameter.
Epoxies are also highly versatile to bond to a broad range of materials, including most metals and plastics.
Whatever your tank’s made of, epoxies are likely to work.
Another great advantage about epoxies is that you can find all sorts of formulations with different specs.
There’s epoxy, whether you need an epoxy with high resistance to temperature, ethanol, pressure, vibration, diesel fuel, or anything else.
The main potential disadvantage of epoxy adhesive is the long curing time. Epoxies require 24 hours to cure completely; some might take even longer.
That being said, there are also epoxies with much shorter curing periods.
Welding
The third and more complex option is welding. You’re using high heat when welding to melt and fuse two components.
As the materials cool down, they form a solid and unbreakable bond.
This method is the most durable but requires additional equipment and at least some know-how to make it work.
Not only will you need welding tools, but protective equipment is equally important.
It’s also worth noting that welding only works on certain materials, specifically metals and thermoplastics.
Luckily, most plastic gas tanks are made of high-density polyethylene, a stiff petroleum thermoplastic suitable for welding work.
Overall, welding is the most demanding solution for a run-down gas tank. However, it offers very long-lasting results.
It’s the best option if you must fix extensive problems such as large holes or rust damage.
Best Glues for Gas Tank Repairs
Here are my recommendations for the best glue for gas tanks.
1. Versachem 90180 Heavy-Duty Fuel Tank Repair Kit
Pros
- Can fix broken plastic fuel tank
- Can fix polypropylene gas tank
- Creates a strong bond
- Water resistant
Cons
- Bad smell
This product is perfect for virtually all sorts of tank repairs. For a highly affordable price, you get a kit that contains everything you need for easy and efficient applications.
This kit contains an epoxy pouch, a handy application brush, mastic, sandpaper, and fiberglass cloth.
You can also use it as glue for stainless steel.
The epoxy is very easy to use and provides a powerful and high-durability bond.
It’s ideal for plastic and metal applications and can be used to fix gas and diesel fuel tank leaks.
What’s surprising about this adhesive is its very short setting and curing time.
While epoxies generally take at least 24 hours to cure, this product cures in just 1 hour. It takes around 8-10 minutes for the adhesive to set.
You can use this epoxy for various types of applications, including for fixing pinholes, rust-outs, hairline cracks, and even patching holes up to 1/2” wide.
Irrespective of your application needs, this is a heavy-duty fix that won’t let you down.
Not only does this adhesive set in less than 20 minutes, but there’s also no need for draining or welding to get the best results possible.
This stuff is highly water-resistant. There’s also added chemical resistance to gasoline, diesel, or kerosene.
This epoxy can withstand temperatures ranging from 40°F to 200°F and has a decent tensile strength of 1500 PSI, so it’s likely to resist a fair amount of pressure and temperature.
2. J-B Weld Tankweld Gas Tank Repair
Pros
- Can fix any broken plastic tank
- Can fix glue any damaged area on a gasoline tank
- Works on metal gas tanks
Cons
- Not transparent color
This J-B Weld epoxy is the epitome of ease of use. This hand-mixable epoxy putty won’t make a mess everywhere.
It’s easy to mix and apply, sets in as little as 5 minutes, and adheres to various smooth metal surfaces, including iron, bronze, aluminum, stainless steel, copper, and brass.
Check out my guide on glue for aluminum for more info.
Curing takes 1 hour; afterward, you’ve got an unbreakable bond. The adhesive cures a dark grey color that blends well with most types of metal.
The steel-reinforced formula offers great resistance and strength. These factors make this epoxy superior to other similar tank sealants on the market.
Once fully cured, this adhesive has a tensile strength of around 900 PSI, and it can be sanded, drilled, and tapped without damaging the final bond.
This epoxy also has high resistance against ethanol, petroleum, hydraulic fluids, and other strong solvents and chemicals.
Moreover, besides having high water resistance, this adhesive is also NSF-certified safe for contact with drinking water.
Last but not least, given its compatibility with various metals, this epoxy is highly versatile.
You can use it not only to fix gas and other fuel tanks but also for metal radiators, stripped threads, metal housings, chemical tanks, and more!
3. POR-15 49208 Fuel Tank Sealer
Pros
- Can glue any crack on a metal gas tank or plastic gas tank
- Works on plastic welding
- Creates a strong bond
Cons
- Area it’s used on needs to be carefully cleaned before application
If you want to fix your gas tanks and also prevent future damage, then the POR-15 49208 Fuel Tank Sealer is the perfect product for you!
This sealant works for all types of fuel tanks; it seals seams and pinholes very effectively and also stops and prevents leaks, corrosion, and rust.
This product is very easy to use. You only need to apply one continuous coating and wait for it to dry.
You’ll also get a considerable amount of product (16 oz) which should suffice for even very large applications.
The sealant will create a smooth, flexible and permanent film. The sealing layer remains strong against all types of fuel, alcohol, and additives.
Even Stage II fuels won’t undo this highly resistant protective layer.
If you’re looking for long-term repairs and want to extend your gas tank’s life, know that POR-15 is the gold standard in rust and corrosion prevention in the automobile industry.
However, I should mention that there is one downside to this sealant.
Unlike other products on the list, this one requires you to remove, drain, and clean your tank before applying. That’s because this product won’t stick to varnish or gum.
POR-15 49208 Fuel Tank Sealer can also be used as glue for magnets.
4. Super Glue Pro Seaz Instant Gas Tank and Radiator Repair
Pros
- Extremely strong bonding
- Works for radiator repairs
- Can fix leaky gas tank
- Works on plastic weld
Cons
- Small container size
This product is specifically designed for fuel tank and radiator repairs.
It can withstand all the extremes specific to car engines, including friction, extreme heat, vibration, and compression.
Even better, there’s no tank removal or draining required when using this adhesive. It also sticks just fine, even on wet surfaces.
Since this is epoxy, you can expect it to adhere to most materials, including metal and plastic.
However, this one is mess-free and very easy to use compared to most other epoxies.
Because it comes in two putty sticks, you won’t need any recipients to pour the resin and hardener.
All you have to do is cut the desired amount and mix the two parts.
In 2-4 hours, the applied epoxy hardens like steel, offering strong and long-lasting repairs.
Curing takes 12 hours, half the time of most regular epoxies.
Regarding its recommended applications, you can use this adhesive to patch up split seams, small holes, and cracks for virtually all types of tanks and radiators.
It’s also an optimal glue for glass to metal.
Why Would the Gas Tank Leak?
Why would your gas tank leak, though? It’s because of rust, in most cases. Rust appears when water enters your fuel system and combines with the oxygen molecules in the air.
If this keeps up over time, it’ll result in oxidation on the metal surface in the gas tank.
If rust accumulates over time on the gas tank walls, the gasoline vapors will create pressure inside the tank, leading to a leak.
If rust appears on the screw threads, it’ll be impossible to attach and detach the tank parts without further damaging the tank.
I recommend cleaning the rust before trying to patch up your gas tank.
However, if the car parts are already very damaged because of rust, you should replace the entire gas storage unit with one created from stainless steel.
How To Patch a Gas Tank – Detailed Guide
If the metal areas of the gas tank have been compromised due to rust or other types of damage, you should patch them up.
There are many ways to do this, all of which have pros and cons.
A common way of patching a gas tank is epoxy glue, especially if you need to patch up larger areas.
To patch up a gas tank using epoxy, follow the steps below:
- Clean the surface before you apply the epoxy. I recommend using acetone to remove the grease, oil, dirt, and other compromising elements from the surface. Wipe with a rag after you’re done
- Apply the primer if needed. If the metals are painted, then a primer is necessary. To patch it up properly, one coat of primer will be needed.
- Let the primer dry based on the manufacturer’s instructions
- With a putty knife, apply the epoxy to the tank’s surface until you fill the holes and cover all the damaged areas with glue. Make sure you use masking tape to delineate the damaged areas before you start applying the glue.
- Don’t add more than two layers of adhesive at one time because each layer needs about 20 minutes to dry. It’ll also take 24 hours for the epoxy glue to cure.
- Before you start driving the vehicle, let the glue dry and cure
Nowra’s gas tank leaks fuel because of rust damage; you can; youch it up using other methods.
An epoxy sealer or a fiberglass matting with polyester resin should work very well in such cases.
Fiberglass repair kits consist of layers of fiberglass matting covered in polyester resin, which will seal any holes or cracks in the metal.
It’ll also prevent further leaks from appearing and allow you to patch up the gas tank without needing to replace it.
To do this correctly, follow these two steps:
Apply Vaseline around the area where you’ll apply the glue, so it all works smoothly from one side to the other.
I recommend wearing gloves to protect yourself from harmful chemicals that could irritate your skin during the bonding process.
Make sure the work surface is entirely covered in Vaseline!
Ensure that the working area is dry and clean before you apply the adhesive.
Use acetone and eliminate all fumes and debris before letting it dry for several hours. Then, add another coat of adhesive.
With fiberglass tape, cut enough pieces so you can cover small sections of 12’’x12’’ every time.
Every piece should be covered in resin and then applied on the metal surfaces carefully so as not to overlap any piece of fiberglass tape.
Overlapping fiberglass tape pieces will lead to cracks, and it may even cause the entire tank to explode if the overlapping is bad enough.
Take care not to burn yourself with the glue gun when applying the adhesive to the fiberglass tape pieces.
If the pieces become too tacky, wait for a few minutes until the resin isn’t absorbed.
In the end, you should be left with a nice and flat surface once the adhesive dries.
But make sure you smoothen the bumps while working around the gas cap area.
This area may stick more than other parts of the gas tank. After placing all the fiberglass tape pieces, let the epoxy dry, and you’re done!
Wrap-Up
With this guide, you should have everything you need to patch up your gas tank properly.
If you follow these instructions closely, you’ll be in no danger after patching up the gas tank. It won’t leak anymore, and it certainly won’t explode.
The Versachem 90180 Heavy-Duty Fuel Tank Repair Kit is my best recommendation for patching gas tanks.
The kit contains everything you need for the entire repair, and the glue also sets and cures within a few minutes.
It’s one of the best products you can use for this project!
